Pages

Saturday, July 27, 2013

DIY Paint-Dipped Kitchen Utensils

Recently I've noticed a new trend on the DIY scene that I thought I'd share with you all - DIY wooden kitchen utensils dipped in paint. It's not a very difficult project and if you click on the links below each example you'll be taken back to the image's source where you'll likely find instructions on how to do the project yourself. I'm thinking about buying an inexpensive set of wooden kitchen utensils like the ones pictured here and trying out this fun and colorful project, and if I do I will definitely share it with you, so stay tuned!


I love how the kitchen utensils pictured above have each been dipped in a paint that is a lighter shade than the next, which makes them look great when they're arranged in this particular way. 


Adding a pop of neon color to your kitchen utensils like the example above is a great way to liven things up during your cooking routine!


The colors of the utensils above are simple yet fun and although don't match perfectly, still look wonderful all together.


The DIY-er behind the kitchen utensils (and cutting board) pictured above has gone above and beyond in their choices of color and pattern. What a great way to add extra interest and fun into the kitchen!


The picture above features lovely utensils decorated with pretty aqua, white and gold paints in a fun striped pattern, which I really love.


Hope you enjoyed! See you again soon!


Friday, July 26, 2013

Wrapping Paper Storage & Organization

For those of you out there who look forward to wrapping and decorating a gift for a special occasion more than celebrating the actual occasion itself, this post is for you! I personally love gift wrapping supplies, especially wrapping paper as it comes in all sorts of fun colors and designs. But having a wide array of gift wrapping supplies will eventually lead to the dilemma of where to store it, so below I've given a collection of examples of ways to do this from around the web that I very much like. Hope you enjoy!


I love how this wooden pastel blue crate above looks lovely in the room all by itself and in addition serves as a great place to hold a large number of wrapping paper rolls.


The colors of the wrapping paper rolls pictured in the photo above are gorgeous by themselves, but the truly genius part of this picture is the way they're stored on the wall (check out the link for more details!)


The wire bucket in the picture above is a simple yet stylish way to display wrapping paper in an easily accessible manner. Plus don't the different colors look great with the room's white walls as a backdrop?


The above is another example of a metal bin that does a great job displaying paper perfectly while still looking stylish and even elegant.


More Rolls of Paper


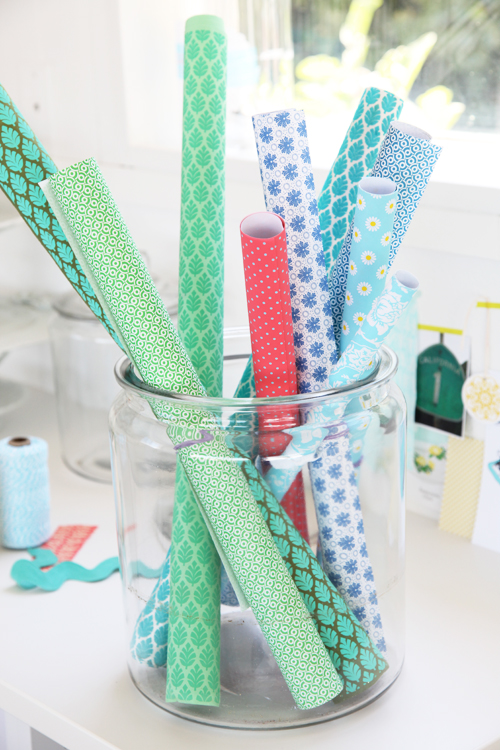
Even though the storage solution above is extraordinarily simple, I love how the clear glass jar allows you to see the entire roll of each paper, making it simple to find what you're looking for as well as doing a great job of adding a fun pop of color to the room. 


That's all for now, hope you liked the post! I'll be back soon for more!

Thursday, July 25, 2013

DIY: Painted Glass Vases

Today I'd like to share with you various examples of a DIY project I myself plan to try out (and share with you here) sometime within the next couple of weeks. The project is painting the insides of glass vases to create a look that can be both simple and sweet or instead bold and lively. From what I have read and heard from several different sources, the project itself is not all that difficult. If you're interested in doing it yourself I would definitely click on the links below each picture to get to it's origin where more often than not you'll be walked through the process of how the project was done. However if you don't mind waiting, as I said I'll be doing it myself sometime in the upcoming weeks and will write a post that provides both pictures and instructions. 


Aren't the pink, orange and red colors of the DIY vases above great? I love how bold they are and their ability to add whimsy and fun to the simple flowers pictured.


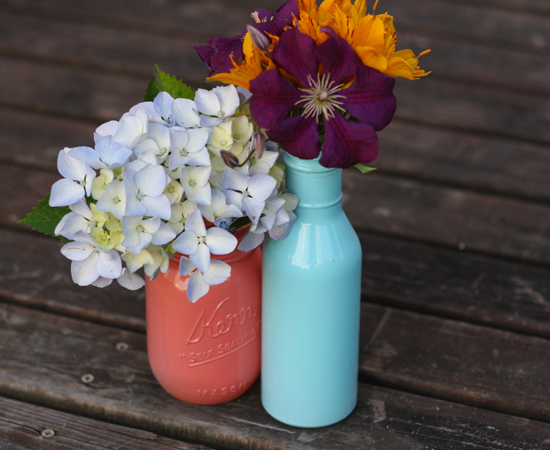
The vases above have a more vintage look and I think the two colors pair very nicely together.


I'm really fond of the way the person behind the DIY vases pictured above has decided to paint many vases of all different sizes and shapes in the same shade of blue. The vases are simple and sweet and the picture itself is beautiful.


The cool and subdued blues and whites of the DIY vases above go perfectly with the silver, blue and white color palette of the room they're pictured in. They're so elegant that if I didn't already know they were DIY vases, I would probably have thought they were pretty pricey.


Again the above is another example of the fun you can have with different colors, and in this case the colors used match perfectly with the flowers pictured.


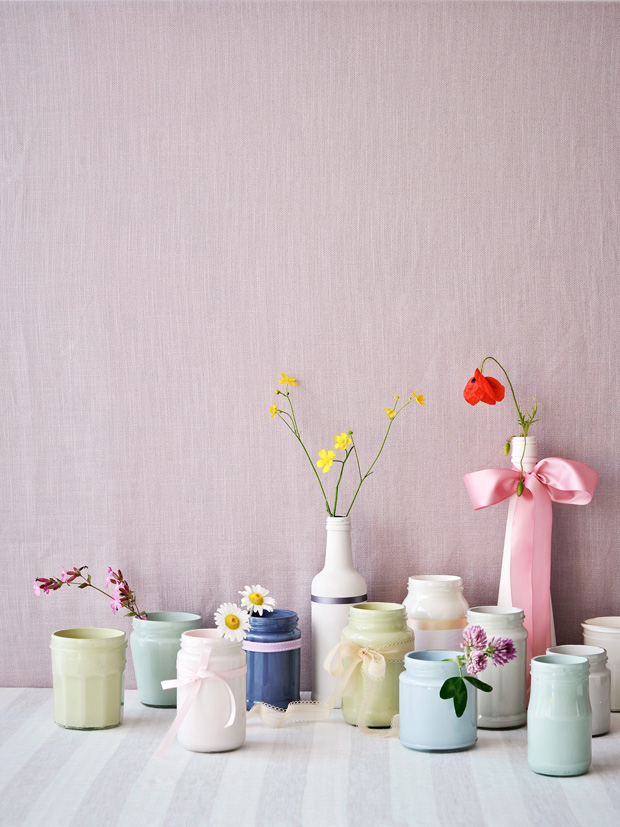
The pastels of the picture above are great. They're simple and sweet and have a romantic feel to them that I really love.


I hope you enjoyed the post and I'm looking forward to sharing my own version of this DIY project with you in the near future!


Friday, July 19, 2013

Bold and Colorful Statement Headboards


It's often said that a bedroom should evoke feelings of serenity and relaxation, allowing us to come home after a long day of work and unwind in our own sacred space. However today, instead of looking at typical bedrooms featuring a soft or light color palette and subtle lines or design elements, I thought I'd show you several bedrooms that break this trend in their color schemes and bold patterns. In this post I'm choosing to focus mainly on headboards that bring these design elements front and center. I hope you enjoy!


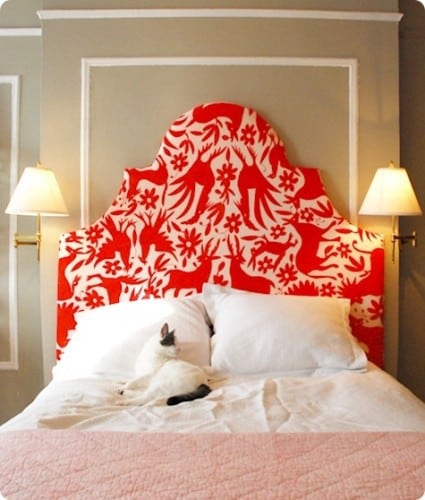
I love how the bold red patterned headboard above contrasts with the softer tan walls, making it the main focus of the room and adding a ton of interest to an otherwise subdued color palette.


The bedroom above does a great job of mixing bold patterns (such as in the striped curtains and patterned headboard) in colors that make a statement and pair nicely with each other as opposed to matching perfectly. This allows the two elements, particularly the headboard, to stand out on their own while still creating a cohesive look that's pleasing to the eye.


The bold yellow floral pattern of the headboard above is definitely a favorite of mine. It certainly makes a statement and draws attention to itself, but at the same time fits in wonderfully with the color scheme of the entire room. I also can't help but like the beautiful yellow and pale blue color palette. 


houzz.com

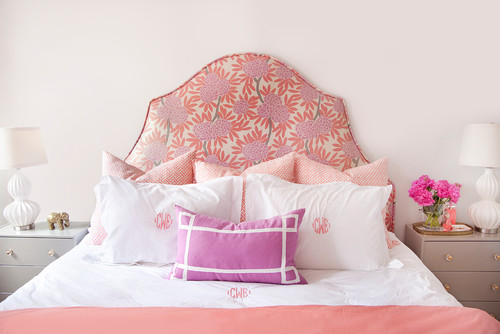
The headboard showcased in the bedroom above is great in that it has a fun and colorful pattern, but in addition it incorporates all of the colors seen in the rest of the room. The pinks, reds, purples and even bits of green in the headboard can also be seen in the pillows, blankets and accessories of the room such as the flowers. In this way the headboard works as a focal point for the room in its bold pattern and colors, as well as in the way it brings the rest of the room together through its own color palette. 


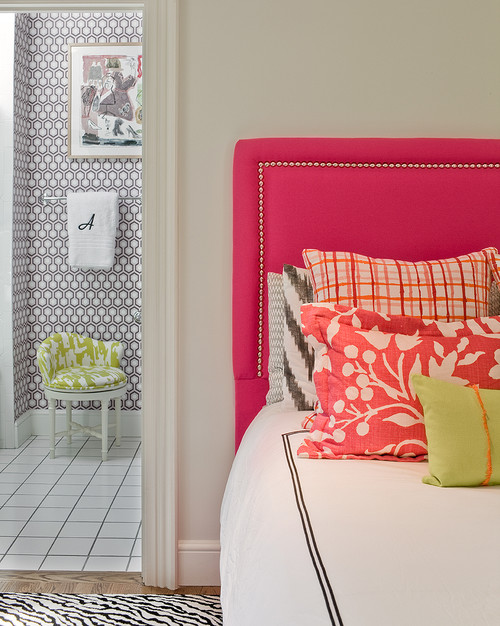
The hot pink rectangular headboard pictured above is a lot of fun and adds the perfect pop of color to liven up the space. Contrasting with the space's general color palette of black white (and bits of green and other shades of pink), the boldness of the headboard's color puts it front and center. In addition, its rectangular shape fits nicely with the geometric shapes and patterns that appear in other elements of the space, such as the bedding and tiled bathroom floors in the background. 


houzz.com

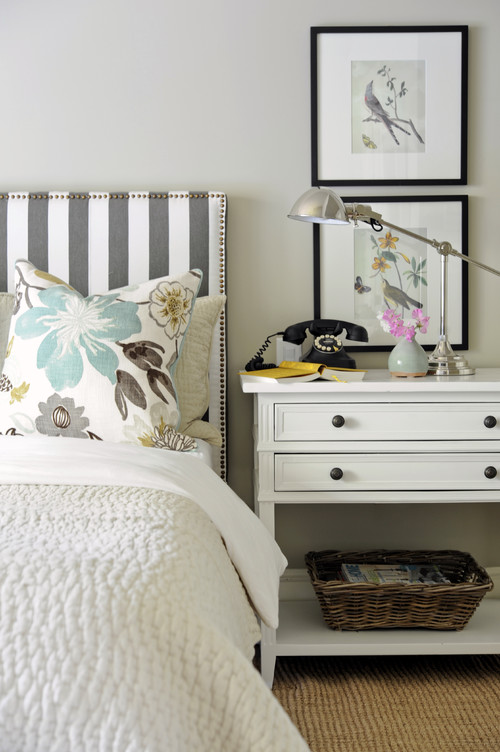
In this final picture, the headboard adds a bold pattern to the room and also features a dark grey color that stands out from the rest of the space's color palette of light grey and white. In this way it is able to stand out and add interest, while still fitting in perfectly with the rest of the room.


Thanks so much everyone and I'll see you again soon!